Make a calculator with Kivy and Python Part 1 - Basics
I've been having fun with this GUI library called Kivy lately. I've been particularly interested in Kivy as it is cross platform to Windows, Mac, Linux, Iphone, Android and the Raspberry Pi. I think its only fair to share what I've learned, as I have had so much fun making a simple calclulator app. Following the documentation found on Kivy's website, I was able to port the application to my windows pc, linux pc, and my android cell phone. The only thing holding me back from Mac, is the lack of having one. The other main reason I feel the need to share about Kivy, is its ease of use. Kivy is its own language developed and dedicated to separating GUI code from procedural code. Hands down, Kivy is my go to for rapid GUI programming, and I have a feeling it might be the same for you soon.
Overview of what will be covered in Kivy Calculator Tutorial Series:
1.) Kivy GUI language syntax -Layouts, Buttons, Labels, and other cool stuff
2.)How to load the Kivy language into python - 3 ways
3.)Writing python code that will work with the calculator GUI
4.)Key Binding the keyboard to the Kivy calculator
This is a lot of stuff to cover, so I'm going to break this up into multiple blog posts. We will cover the basics of parts 1, 2, and 3 in this part of the tutorial. What you learn here can be applied directly, to making other programs. If your looking for a "one press of a button runs a function" kind of tutorial, you've found it. :p
Just remember that you have to install kivy for this tutorial. Its a simple process though. Here is a link to that.
1.) kivy language syntax
Kivy is a language dedicated to building GUI platforms for python applications. Applications made with kivy are cross platform, allowing you to create (with cross platform dependencies being kept in mind) on one operating system, and be able to run it on any other system, as is typical with most python programs. Kivy’s main focus is to separate the GUI side of programming from the function processing side of programming.
There are three ways to program with the kivy language.
1.) The kivy language can be defined in a separate file with the ".kv" extension name. This separate file will be imported into your program.
2.) The language can be used directly with in the python file using an imported function from the kivy library (my preference as I don’t have to switch back and forth). We will be employing this method today.
3.) The language can be skipped, and instead, can be used as a python import, similar to the way Tkinter, and every other module is used. In this case, one would have a seperate GUI.py file with all the commands necessary to construct the GUI.
Terminology - If you are an experienced veteran, feel free to skip this part :)
Let’s get some basic terms out of the way:
GUI - Graphical User interface. We all have seen parts of the Matrix. Thinking back to that movie, I can remember the cool green text effect on the computer screens surrounding Neo. Every computer, at its core operation, is exactly like that, just a command prompt. The only thing separating us from having to work with that “green and black” text screen is called a Graphical User Interface. Long story short, somebody, somewhere said to themselves “hey, it’d be great if we didn’t have to type every single command in when working with these machines… maybe if we had pictures that we could click on or something…” and many years later, we ended up with the wonderful world of GUI based “point and click” systems that we have today. I understand this a broad simplification of GUI, but for the most part, will help you to understand the difference between GUI programming, and Command line programming.
Widget - A widget is an object that represents a graphical portion of the screen. I know this sounds counterintuitive, but a widget does not have to be visible. A widget can refer to an invisible box on the screen. This invisible box can register touch input from a user, and refer it back to the python program for processing, like in the canvas of a paint application such as GIMP. These widgets interact with one another providing information based upon user input. This information is usually passed to methods that perform a calculation and then return the result back to the GUI for the user to view. Simply put, a widget can be a button, a field for user input, an image, a layout to place other widgets in, pretty much anything and everything.
App - This refers to your program as a whole. You will see this terminology being used in kivy alot. An App will contain all of the widgets needed for your program to function. After programming the app, we can port it to windows, mac, linux, android and iphone, given that we make sure we have our dependencies met.
Layout Widget: This type of widget holds others widgets. Typically speaking, there are different layouts based upon how the programmer wants the widgets to be displayed. We will create a Layout widget, and will place other widgets such as Button widgets, and Label Widgets within said Layout widget. We can even nest Layouts within Layouts. According to the Kivy programming guide, this can be done infinitely, with respect the horsepower of your PC.
Button Widget: This type of widget is the most common. We have all seen buttons in programs, and almost every single GUI based program uses buttons as part of its main operation. There are many different types of buttons, but there main purpose is to allow a user to call a function (ie. Do something when pressed).
Label Widget: This type of widget will show the user some kind of information. We can assign a function to a Button Widget, and when it is pressed, we can update a Label widget to display the information found from the function. This is pretty much the process for 90% of programs. Don’t quote me on that number please. :p
TextInput Widget: This type of widget allows a user to input information. The information will be read as text. It can be multi line, or single line. This can be also used for inputting password information, and can be programmed to display stars instead of the inputted characters.
*While we will not be using the TextInput widget in this tutorial, it is important to note, as these four Widgets will make up a large majority of basic GUI programs.*
Now that we have that out of the way we can start some programming!
I’m going to be doing this on my windows platform, but you can still do this on linux as well. I haven’t tried it with a Mac, so I can’t vouch, but I see no reason why it can’t be done there as well.
If you need to install kivy still, there is a straight forward tutorial found here at kivy’s website. Its a simple process. If your completely new to kivy, still fresh with python, and want more of a “hold hands” tutorial, I'll be working on one for you, so check back shortly. :)
We are going to start by importing the widgets that we will use from the kivy library.
We are going to be using the Layout, Button, and Label Widget. The structure for importing, is pretty much as listed above. We just import what we need. And if we are figuring it out as we go, then we will keep adding imports for all of the widgets that we are using, as we figure out whats needed.
#These are the base imports needed to run our GUI program.
from kivy.app import App
#we must subclass the App in order for our program to run
from kivy.uix.boxlayout import BoxLayout
#This is the base layout of our program. We will talk more about this later, so don't worry if your #not comfy with it yet.
from kivy.lang import Builder
#Builder is the command neccessary to read the kivy language with in our python code.
Builder.load_string('''
#This is were we include our kivy language. The language used in here will define our GUI's look
#and feel.
''')
class RootWidget(BoxLayout):
#This is were we define the main functions for our program. We can import from other modules, or define them here.
pass
#Everything from the here to the bottom of this script is what is neccesary to call/run the program
class IneedMyCalculatorApp(App):
def build(self):
return RootWidget()
if __name__ == '__main__':
IneedMyCalculatorApp().run()
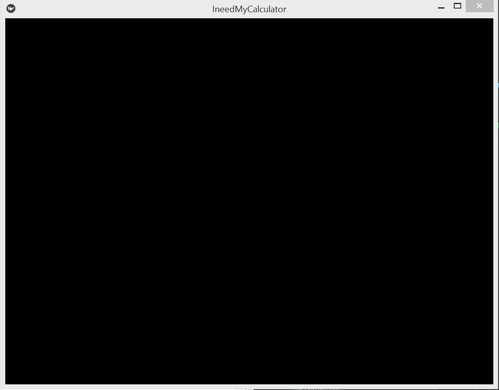
If you run the above code you will see a black box. This is the bear bone base for a kivy application. We have our imports, and at the bottom we have the section of code responsible for running our GUI.
For now I want to focus on two things.
1.) the code
"Builder.load_string("""
""")
2.) the class being defined
class RootWidget(BoxLayout):
These two are the most vital portion of the program. In the Builder.load_string() we will place all of our kivy code here. This is where everything GUI is defined. This function will load our code, and will construct the GUI.
The second RootWidget(BoxLayout): is where we will define all of our functions for the program to process/accomplish its goal. I.e. if we wanted a program that had a button, and printed "Hello", we would define the button portion within in the builder.load_string() function, and we would define the print("Hello") function with in the class we created called RootWidget()
Lets take a look at how that would be coded.
Builder.load_string('''
<RootWidget>
Button:
on_press: root.printer()
''')
class RootWidget(BoxLayout):
def printer(self):
print("Hello")
<RootWidget>
Button:
on_press: root.printer()
''')
class RootWidget(BoxLayout):
def printer(self):
print("Hello")
Inside the Builder.load_string() function we have the code
<RootWidget>
Button:
on_press: root.printer()
This piece of code is the kivy language itself.
The code <RootWidget> tells kivy to look at our class, and inherits its base layout from there, which is a BoxLayout, as well as to look at our RootWidget() class for its functions.
The Button: code tells kivy to add a Button to our base layout.
The on_press:root.printer() code tells kivy to look at our RootWidget class for a function named hello, and will call that function every time our button is pressed. The word "root" placed before printer() tells kivy to look at our RootWidget() class for the function named printer. Please note that there is no correlation between root and the class name RootWidget(). Ie. if you change RootWidget() to DavidsWidget(), the method of assigning the hello function will still read
on_press: root.hello()
notice how the tabs signify which what feature is part of what. The on_press: is a part of the Button, and the Button is a part of the Root Widget. We can nest as many widgets as we want within in our <RootWidget>, but we can only have one <RootWidget>. This one <RootWidget> is linked to our class, and our class is called through certain portion of code at the bottom of our script - return RootWidget().
The words "RootWidget" in this portion can be replaced with anything preferred, but the name of the class it inherits from must be named the same thing as well.
So if you change
<RootWidget>
to
<DavidsWidget>
you must also change
class RootWidget(BoxLayout):
to
class DavidsWidget(BoxLayout):
Now if we take our code, and place it back into the program we get some thing that looks like this.
<RootWidget>
Button:
on_press: root.printer()
This piece of code is the kivy language itself.
The code <RootWidget> tells kivy to look at our class, and inherits its base layout from there, which is a BoxLayout, as well as to look at our RootWidget() class for its functions.
The Button: code tells kivy to add a Button to our base layout.
The on_press:root.printer() code tells kivy to look at our RootWidget class for a function named hello, and will call that function every time our button is pressed. The word "root" placed before printer() tells kivy to look at our RootWidget() class for the function named printer. Please note that there is no correlation between root and the class name RootWidget(). Ie. if you change RootWidget() to DavidsWidget(), the method of assigning the hello function will still read
on_press: root.hello()
notice how the tabs signify which what feature is part of what. The on_press: is a part of the Button, and the Button is a part of the Root Widget. We can nest as many widgets as we want within in our <RootWidget>, but we can only have one <RootWidget>. This one <RootWidget> is linked to our class, and our class is called through certain portion of code at the bottom of our script - return RootWidget().
The words "RootWidget" in this portion can be replaced with anything preferred, but the name of the class it inherits from must be named the same thing as well.
So if you change
<RootWidget>
to
<DavidsWidget>
you must also change
class RootWidget(BoxLayout):
to
class DavidsWidget(BoxLayout):
Now if we take our code, and place it back into the program we get some thing that looks like this.
from kivy.app import App
from kivy.uix.boxlayout import BoxLayout
from kivy.lang import Builder
Builder.load_string('''
#we name this RootWidget so that it inherits from our
#class Called RootWidget.
#This will give the application a BoxLayout at as its base.
#If we don't want, we don't have to apply any other layout,
#but most situations will call for the use of different layouts.
<RootWidget>
Button:
on_press: root.printer()
text: "I am a button!"
''')
'''Not how BoxLayout is passed as the argument to our RootWidget. You can change its layout Base by placing your choice of layouts here in place of "BoxLayout." '''
class RootWidget(BoxLayout):
def printer(self):
print("Hello")
'''Here is where we Name our application, and define the parameters needed for it run
Note how the program returns RootWidget() - The class we defined the printer function in.'''
class IneedMyCalculatorApp(App):
def build(self):
return RootWidget()
#Here we actually call the program to run.
if __name__ == '__main__':
IneedMyCalculatorApp().run()
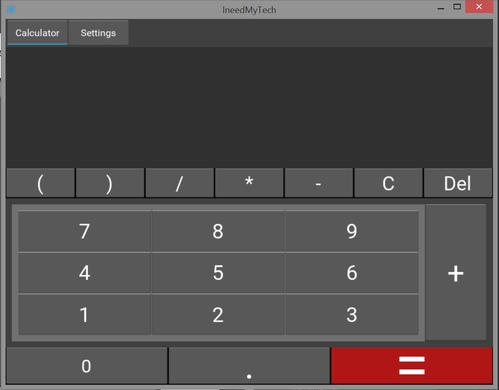
And if we run that code we get this

That is the result of running the above code. Note how when you press it, the console runs our function that was defined within our class RootWidget(), and prints to the screen "Hello". This is the basic principle/building blocks for all kivy applications. Somewhat painless right? Now as we know the basics of Kivy, we can start working towards building real applications that are portable to all platforms. By following this series of tutorials you will have the ability to make applications just like this calculator, and much more, so stay tuned! :)
2 Comments
Thank you so much David
It is very useful for me .
I am waiting to your next tutorial.
Can u please provide me with the source code for the completed calculator using kivy .
I am currently doing a project for which It would be so helpful. Please do mail me or provide the link .